How to Install a Dash Cam in a Rental Car
Without Fuse Taps
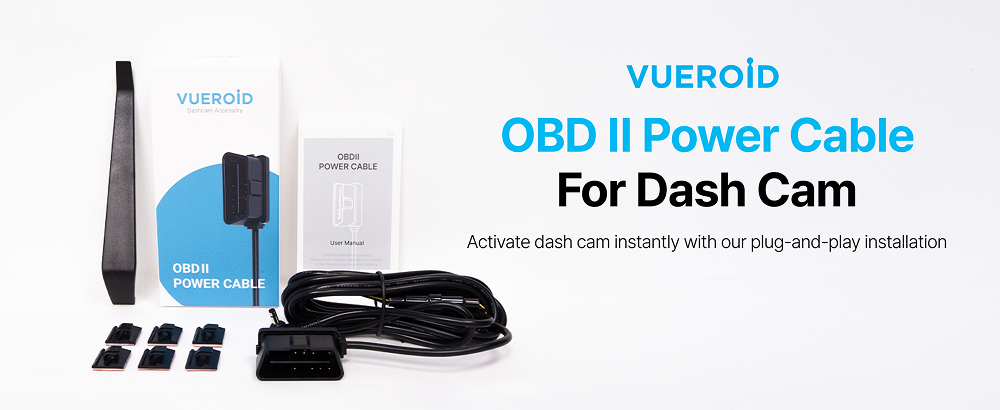
Renting a car doesn’t mean giving up dash cam protection. Whether you’re worried about a parking lot ding, a hit-and-run, or just want footage on an unfamiliar road, you don’t need to touch a rental’s fuse box to get a fully functional 4K Dash Camera running. The OBD-II port — a standard connector present in essentially every rental car — makes it possible to power a dash cam temporarily, cleanly, and completely reversibly.
Why Use an OBD-II Power Adapter?
Permanent dash cam installations typically use a hardwire kit connected to the fuse box. That may be appropriate for a vehicle you own, but it is usually unsuitable for a rental.
Most modern vehicles have a standardized OBD-II diagnostic port, commonly located beneath the dashboard near the driver’s side. A compatible dash cam power adapter can use this port to supply power without modifying the vehicle’s factory wiring.
An OBD-II setup may support:
- Continuous recording while the vehicle is running
- Automatic switching between driving and parking modes
- Low-voltage protection to reduce the risk of draining the 12-volt battery
- Quick removal when the rental period ends
Support for these functions depends on the vehicle, adapter, and dash cam. Confirm compatibility before your trip rather than assuming that every OBD-II port provides the same power behavior.
What You Need
For a temporary installation, prepare:
- A front-only or front-and-rear dash cam
- A compatible OBD-II power adapter with low-voltage protection
- A high-endurance memory card supported by the camera
- Removable automotive-grade adhesive or a rental-safe mounting method
- A cleaning cloth and glass-safe cleaner
- Optional trim tools for gently positioning cables
Step 1: Check the Rental Policy and Equipment Compatibility
Before installing anything, confirm that the rental agreement permits removable accessories and connections to the vehicle’s OBD-II port. Check the dash cam and adapter manuals to make sure they support the required driving mode, parking mode, and low-voltage protection.
Locate the OBD-II port and verify that the adapter fits without obstructing the pedals or other driving controls. For a two-channel system, also confirm that the rear-camera cable is long enough for the vehicle before mounting either camera.
Step 2: Test the OBD-II Power Connection
Connect the power adapter to the OBD-II port, then connect it to the dash cam. Turn the vehicle on and confirm that the camera receives power and begins recording.
At this stage, a basic power check is enough. Driving- and parking-mode transitions will be verified after the complete system has been installed and configured.
Step 3: Plan a Safe Cable Route
Plan the entire cable path before securing the cameras. Cables must not interfere with:
- The accelerator, brake, or parking-brake controls
- The steering column
- Seat tracks or door mechanisms
- The driver’s field of view
- Side-curtain, dashboard, or pillar airbags
For a temporary installation, it is often safer and easier to route the cable along accessible trim edges instead of pushing it deeply behind the headliner or pillar trim. Never run a cable across an airbag cover or place it where it could affect airbag deployment.
Secure loose cable so it cannot fall into the driver’s footwell. Avoid routing that requires forcefully removing trim, and do not alter factory clips or fasteners. When routing a rear-camera cable, leave enough slack at moving joints so doors or the rear hatch cannot pull on the connector.
Step 4: Mount and Aim the Cameras
The front camera is commonly placed behind or close to the rearview mirror, provided it does not obstruct the driver’s view or interfere with sensors already mounted on the windshield.
Clean and dry the mounting area before applying removable adhesive. Turn on the dash cam while positioning it so you can use the screen or mobile app to check that the image is level. Adjust the lens to capture the road clearly, with a smaller portion of the frame showing the sky and dashboard.
For a two-channel system, position the rear camera where it has a clear view through the glass. Consider:
- The area cleared by the rear wiper
- Rear-window defroster lines
- Existing tint, sensors, or factory equipment
- Movement of the hatch or
Use removable automotive-grade adhesive for both cameras unless the rental company has approved another mounting method. Make sure each mount is secure, and keep the installation clear of factory equipment.
Step 5: Configure Recording and Battery Protection
Insert a compatible memory card and format it in the dash cam. For a multi-channel system, confirm that every connected camera is enabled and recording.
Review the following settings:
- Front and rear recording resolution
- Date, time, and time zone
- Audio recording preferences
- Loop-recording duration
- Parking-mode sensitivity and recording type
- GPS and speed-display preferences, if available
- Low-voltage cutoff and parking-mode timer
Use the live-view screen or app to aim each camera. The front view should clearly cover the road ahead. The rear view may be angled slightly downward when appropriate, but it should still capture useful context and approaching vehicles.
Parking mode can place a load on the vehicle’s 12-volt battery. This matters in all vehicles, but hybrids and electric vehicles may manage their 12-volt systems differently from conventional gasoline vehicles.
Do not apply one cutoff-voltage value to every rental car. Use a setting recommended by the dash cam or adapter manufacturer for the specific vehicle type, and choose a more conservative cutoff or shorter parking timer if you are uncertain. If the rental will sit unused for an extended period, disabling parking mode may be the safer choice.
An OBD-II connection does not guarantee unlimited parking recording. Available recording time depends on battery condition, vehicle behavior, temperature, camera power consumption, and cutoff settings.
Step 6: Test the Complete System
Before driving, complete a final check:
- Confirm that the front and rear cameras are recording.
- Verify the live view and camera angles.
- Check that the date and time are correct.
- Turn the vehicle off and confirm parking-mode operation, if enabled.
- Restart the vehicle and confirm that normal recording resumes.
- Confirm that all cables remain secure and clear of driving controls, airbags, doors, and moving panels.
- Review a short test recording to confirm image quality and memory-card operation.
Stay Protected Throughout the Rental
With this temporary setup, a rental car can benefit from dash cam coverage throughout the rental period, helping you capture important driving and parking events without making permanent changes to the vehicle.
When it is time to return the car, carefully unplug the OBD-II adapter and remove the cameras, cables, mounts, and adhesive residue. Take care not to damage the glass, trim, connectors, or factory equipment. Because the installation is temporary and reversible, the vehicle can be easily returned to the condition in which it was originally rented.
This guide provides general installation information. Vehicle designs, rental policies, and dash cam power requirements vary. Follow the vehicle, adapter, and dash cam manufacturers’ instructions, and obtain permission from the rental company when required.